Monday, September 13, 2010

Campaigning for Votes! Vote 4 Me! Please!

NOW FOR AN IMPORTANT ANNOUNCEMENT!

*** I NEED YOUR VOTE ***
I am in the running for a sponsorship from Prilosec OTC.

If chosen a sponsorship would provide me with recording equipment to make mixed media art classes and tutorials. These classes and tutorials would be made available to you for FREE on YouTube.

I have so many ideas for art techniques to share with you all. 

Please help me by going and voting! You will need to sign up on their site to vote but I promise you that they do not share your information and you will receive no aggravating spam emails.


Just click the link above to go vote for me Thespoena M., and if you have a minute please leave a comment under your vote. Comments get noticed by judges.

*** If you know someone who would like to take FREE mixed media art classes and tutorials, please pass this link along and ask for votes. ***

Thursday, July 1, 2010

New Graphic 45 Paper, I'm MAD over it!

Just browsing the web when I came across the new line by Graphic 45. That's when my heart stopped beating and I went a little "Mad".
Their new theme is Halloween in Wonderland. And as if I wasn't crazy enough for Alice in Wonderland themed items, I'm double crazy about the Halloween theme applied to it. 
Can you say "Sa-Weet!"?
I'm dying to get my hands on some of this product!
Gotta get it!

Friday, June 18, 2010

Where Bloggers Create II Blog Party - A scrappy Organizer

My scrapbook "studio" is really just a small part of my overall studio which I shared on my mixed media blog
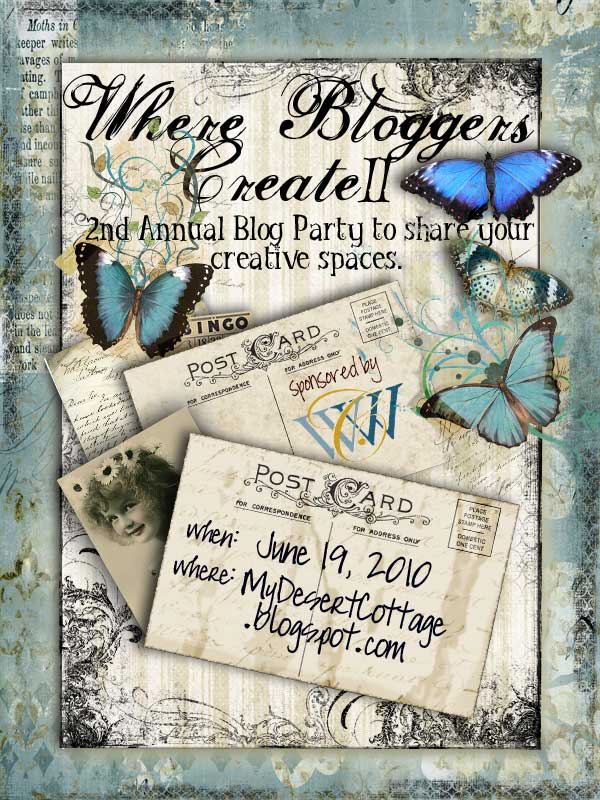
If you want to see it, it is also a part of the Where Bloggers Create Blog Party.

But I did want to share this easy to make paper storage rack.
You've probably seen these online here and there made by others but mine has a unique twist that makes it a multi-purpose organizer.
No doubt you have seen these wire storage racks before and may have bought them thinking there were about perfect, but the truth is they don't hold much and are very prone to breaking. The little plastic corner connectors are the problem. Once those break you are left with a bunch of useless flat wire mesh squares.
Instead of throwing them out or instead of using those worthless plastic connectors in the first place, reconfigure those wire panels into a completely different creature.
For my scrapbook paper organizer I used 11 wire panels. 
2 for the back, 2 for the left side, 2 for the right, 1 on top, 1 in the center and 1 on the bottom. Then another 2 as shelves for the bottom cube. Go to any hardware store and purchase heavy duty zip ties. Use the zip ties to construct your own shelves in any way you want them. They don't have to be stacked on top of each other you can make the same thing with a side by side version for a more horizontal space.
My top cube was left open so that I could hang clear stamps and rub-ons in it.
Instead of buying those pricey hooks that go on those metal ring organizers (yeah you know the ones)
I went to Wal-Mart and bought some I.D. badge clips. They snap easily onto the wire in the panels and you can clip up lots of packages in one clip.
See them hanging up top? Now I can see what all I have and can use it up instead of it being lost to the piles.
You can even clip things to the outside of your wire organizer. Oh yeah, I love Tattered Angels!
This is my Paper Crafts Magazine Stamping Royalty crown I won from 2007, proudly displayed on my vintage mohair hat.
This is my scrappy tote that I take to crops, it holds pages in progress as well as a few other things I want to keep track of.

Anyway hope some of this info is helpful, hope you have a great week!

Tuesday, June 8, 2010

Where Bloggers Create 2 Blog Hop!

I'm signing up for this fun event and you should too. I get the biggest kick out of visiting the studios and creative spaces of other talented individuals and this is just the place to do it!
Click the link in my sidebar to find out how to join in the fun at My Desert Cottage!

Friday, June 4, 2010

For the Love of All that is Ranger!

One of my favorite companies...Ranger Industries.... is now part of the blogging world!
Woo-Hoo!
I'm so excited. Can't believe they haven't been blogging already. 
Go check out the new blog they started today!

Wednesday, June 2, 2010

Fun with Photofunia.com

I just found this really awesome photo site 
where you can choose a fun theme and upload a picture and your picture is automatically sized and fitted into the theme. 
They've got some really great themes, tons and tons of them to play with for FREE!

Go check it out!

Tuesday, May 25, 2010

Perspective through the lens

We have a bumper crop of strawberries this year, I have a big turquoise colander that we put them in. I love the contrast of the red strawberries against the turquoise and I was playing around taking pictures of them. I wanted to see if my little point and shoot digital camera would take a picture through one of the holes in the colander and it worked, really neat!
I'm going to be making a scrapbook page with these pictures as soon as I get the right paper.


Try taking a picture from an unexpected angle or through something you normally wouldn't think of.

Wednesday, May 19, 2010

My mom at Christmas


For Christmas I made my mom a pink flamingo Mardi Gras mask. She lives down in Biloxi MS and goes to Mardi Gras every year. She also loves pink flamingos. This week she posted pics on facebook from Christmas morning.


Monday, May 10, 2010

A Berry awesome assortment! Win some Prima!

I'm so loving this selection of Prima products. I have several of these and they are so gorgeous up close. This is a giveaway at the Prima blog. Simply post about it and leave a link in their comments section here...

I love Prima!

Friday, May 7, 2010

A Mini Card - Cute and Quick!

I made this little card in about 10 minutes last night.
1. Cut a piece of recycled cardboard down to 3 1/2" x 5"
2. tear off outer layer of paper and fold in half
3. add white paint to edges and randomly over ridges
4. ink edges with Tim Holtz Distress Ink and curl by rolling edge between fingers
5. ink edges of 2 white tags with Tim Holtz Distress Ink and stamp sentiment
6. add layered Prima flowers and Say it in Crystals
7. add solid card stock to inside

Simple fast easy and cute mini card...
Check out the vintage fan that I found at the flea market this week. $10 score! I love the dusty turquoise color. It's going in my studio after I get it cleaned up. I'm taking it apart today and oiling etc so it will last for many more years to come.

Hope you have a happy day!

Thursday, May 6, 2010

Pretty cute acrylic Spring Thank you card

Here is a little card I made out of an acrylic page left over from an acrylic album kit. Sassafras Lass paper behind, the edges of the acrylic page are inked with Stazon permanent ink. 
I put a little ribbon through the hole in the acrylic page where the o-ring would have gone.

Thank you for visiting! I hope your day is full of color!

Wednesday, May 5, 2010

Thanks a Bunch Card

 A little card I put together yesterday. I think I'll enter it into the Paper Crafts Gallery Idol Contest. Uses Prima flowers, paper by American Crafts, sequin trim, brads by the Paper Studio, and Moxie die cut letters.


 I hope you have a wonderful day! And Thanks a Bunch for visiting!

Tuesday, May 4, 2010

So happy to be a MOM

I love my children so much! I made this layout a few years ago, it was on of the first pages I did while experimenting with different stitching. It was a fun page to do, I even got to use a little bit of my vintage ribbon stash, check out that groovy "love" seam binding, how cool is that!
Hope you are all having an excellent day!

Monday, May 3, 2010

Junk Mail = Free Projects! Woo-Hoo!

A few months ago I got some awesome junk mail! It was a thick envelope with a file folder style pull out that was advertising some kind of flu medicine. (must not have been very good advertising as I couldn't tell you what kind of medicine it was) But I instantly said "this would be perfect for scrapbooking" and "filed" it away till later. I found this wonderful collection of BoBunny scrapbook paper and decided it would be perfect for my junk mail folder.
Open the cover with a velcro tap that it came with!
Inside is this folding file booklet perfect for holding holiday pictures.
 Pull that booklet out and this is the cover.

Finished project minus holiday photos that still need to be printed out.

I won & you can too... Spreading the Graphic 45 Love!

Graphic 45 papers had a paper giveaway on National Scrapbooking Day and I won! Woo-Hoo!
Their papers are so awesome, I love all that vintage goodness. Can't wait to see which patterns come in the mail.

Now on to the part where you can win too...
Become a fan of G45 papers on Facebook, they are giving away papers to their new fans.
If you are already a fan you can go leave a comment on their blog to win.

There isn't much time left... so you better hurry!

Friday, April 30, 2010

Pretty Mama!

This is my mom. Just a "few" years ago. She's so pretty. I remember riding in the yellow car, laying on the seat beside her when I was little (before car safety seats) There was always music playing and singing while driving down the road (something I torture my kids with today, LOL)

"By the hand, take me by the hand, pretty mama, come and dance with your daddy all night long, I'd like to hear some funky Dixieland pretty mama come and take me by the hand."
-Black Water by the Doobie Brothers

 Took me a while to find just the right paper for these pictures. But I think it worked out "pretty" well.

Have a happy day!

Thursday, April 29, 2010

A day full of Joy and a card to match!


Just a little card entitled "JOY" I threw together last weekend while playing with layers and Prima flowers.

And speaking of "Joy" I recently found out that my cousin Joy was pictured on the cover of a craft book. 
That's her all the way to the right on the end. Wow! How cool Joy! 

Hope you are all having a "joyful" day!

Wednesday, April 28, 2010

Shabby Chic Dry Erase Board -Free pattern


I made a pretty, shabby chic dry erase board. Very fancy with an antique frame. 
I put a .pdf of the background image on my other blog and you are welcome to use it for Personal Use.


 These are closeups of the Prima products I used to decorate the glass.


 Hope you have a very Happy Day!

Thursday, April 22, 2010

How to Alter Prima Flowers

Last night I was playing with Prima flowers. I've been working on a mixed media paper crown for a while and it needed something else, though I wasn't sure what it needed till last week. My local scrapbook store "Signed Sealed & Delivered" in Rogers AR got their new Prima Flowers in and I found just the right ones to finish off the crown. 
I also had a tube of white Prima flowers that I altered a bit and following is the step by step process that led me to the vintage style glittery goodness above.
1. You'll need some white Prima flowers.
2. lightly moisten the edges of a Prima flower and ink with Tim Holtz Distress Ink in tattered rose.
3. Now lightly ink the edges with Tim Holtz Distress Ink in tea dye. Even though we will be covering the edges with glitter the Distress Inks blend very well and you get a lot of depth with just a little bit of color. It will make a difference in the finished product.
4. Run a fine bead of Beacon's 3-in-1 craft glue along the tip of each petal. (Beacon's craft glue is the best glue around, if you haven't tried it you really need to get some. You'll never use another glue again!)
(Closeup of the glue with pile of glitter in the background)
5. Dip the glued edge of Prima flower into a pile of fine glitter and repeat for each petal.
Finished glittered petals.
6. Add a fancy Prima flower to the center of glittered petal and add to your crown or whatever project you are working on.
My almost finished crown.
Front of crown. Uses Graphic 45 scrapbook papers, Tim Holtz Distress Inks, generic fine glitter, and Prima flowers.

Hope you like this look at altering Prima flowers. 
Have a very happy day!
Bo Bunny Mango Luau Blinkie Pictures, Images and Photos

My Blog List

Vintage Plum Goodness